This guide shows you how to create, configure, and manage firewall rules for your virtual machines in Server Monkey Cloud VPS. Secure your server with advanced firewall protection.
Step 1: Access Firewall Management
Log into your Server Monkey client portal and navigate to your VPS service. Select "Firewall" from the management sidebar to begin configuring security rules.
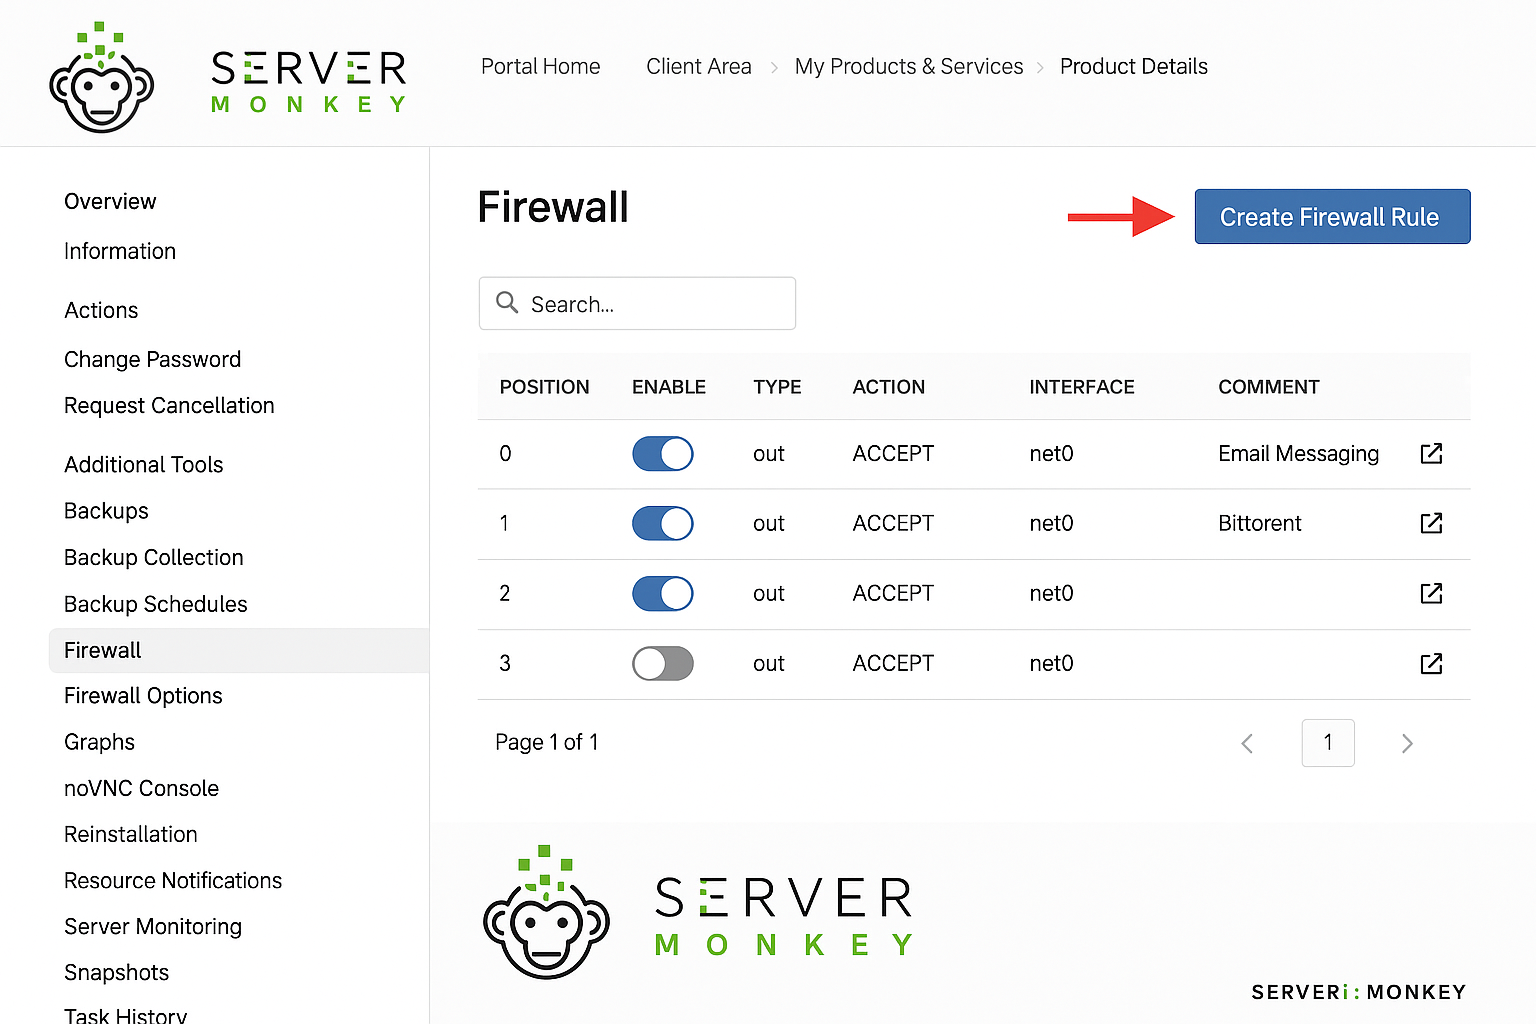
Step 2: Access Additional Actions
Use the three-dot menu for advanced firewall management options. Access security groups, backup, and restore functions for comprehensive rule management.
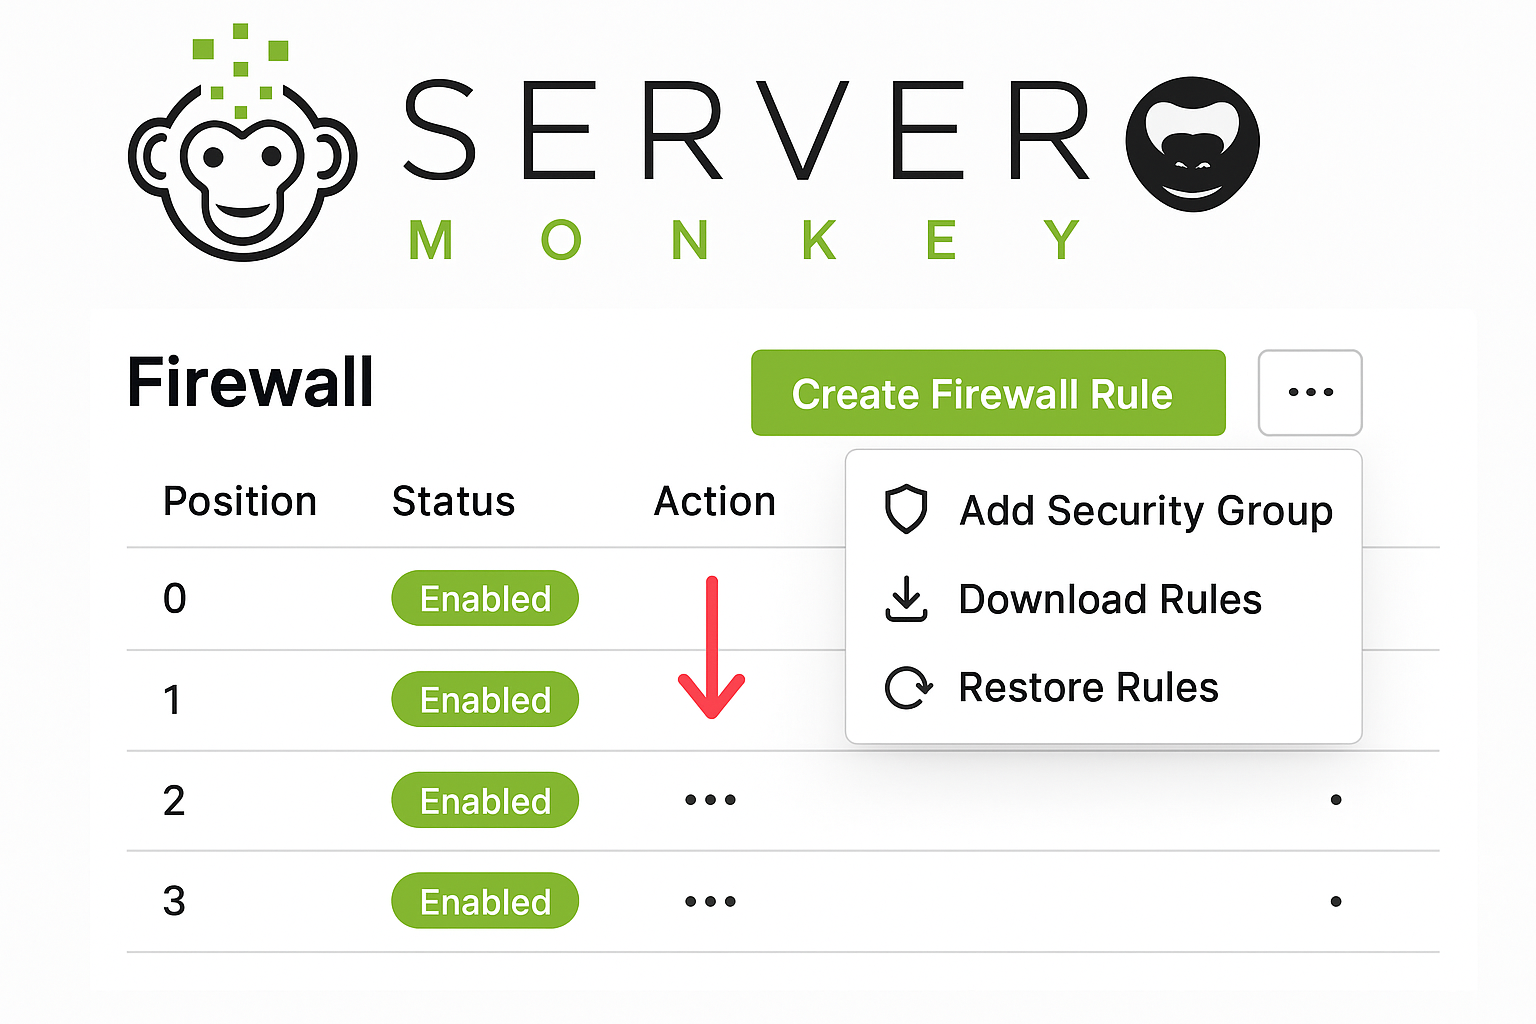
Step 3: Create New Firewall Rule
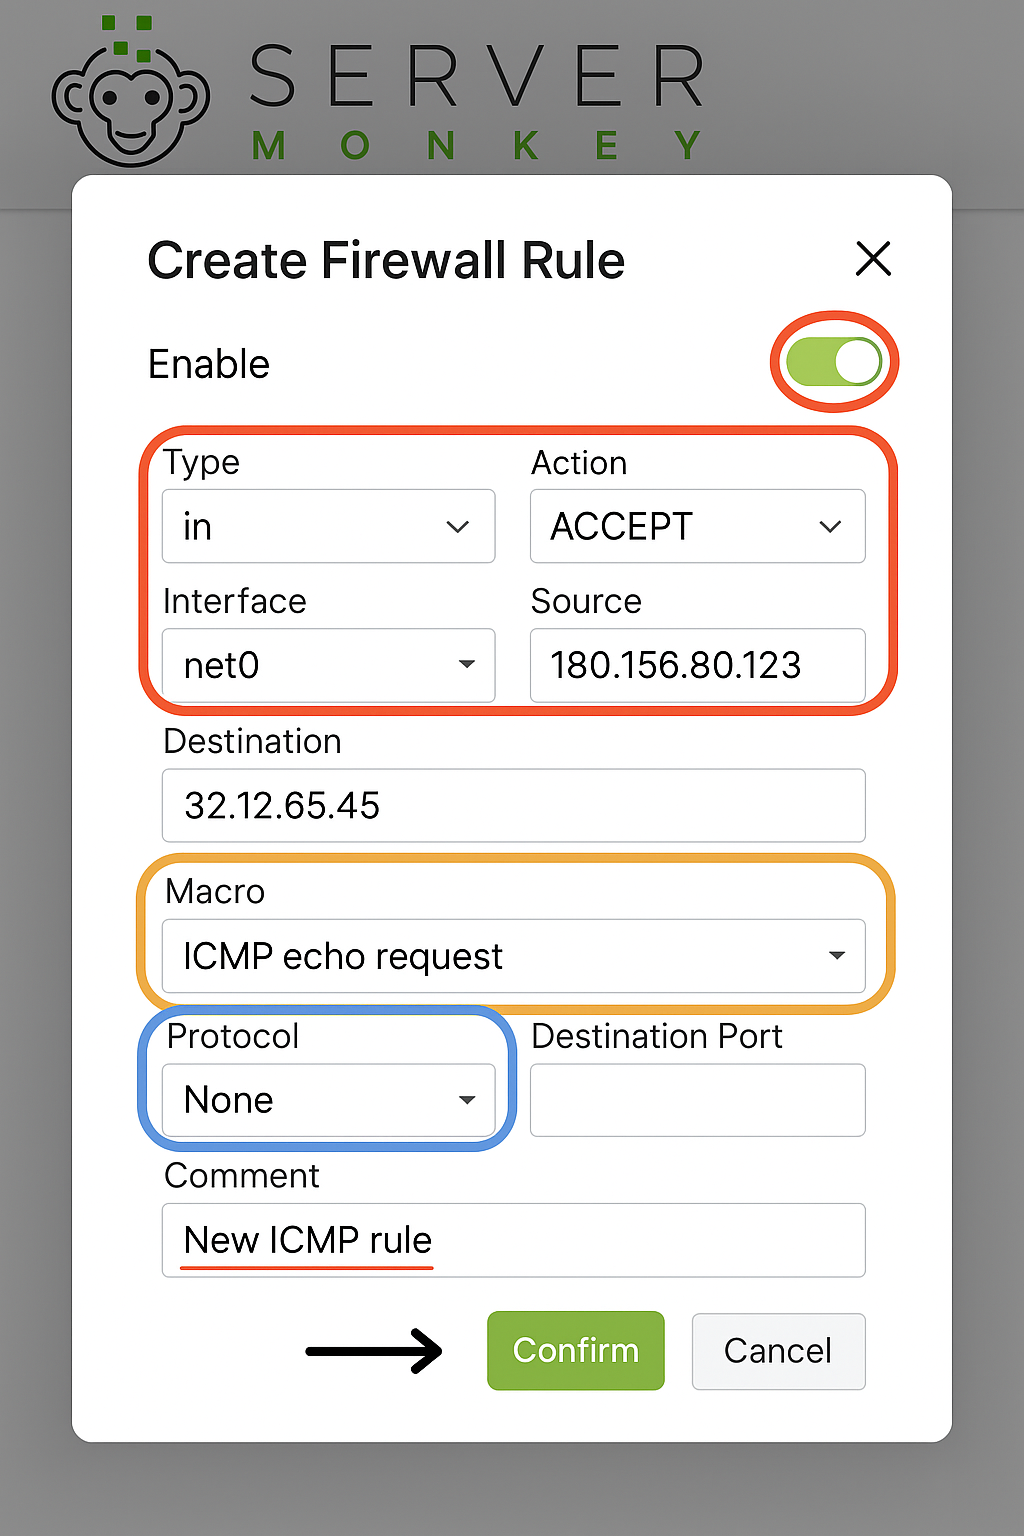
Click the "Create Firewall Rule" button to open the rule configuration dialog. Configure source, destination, protocol settings and use macros for common protocols.
Step 4: Add Security Groups
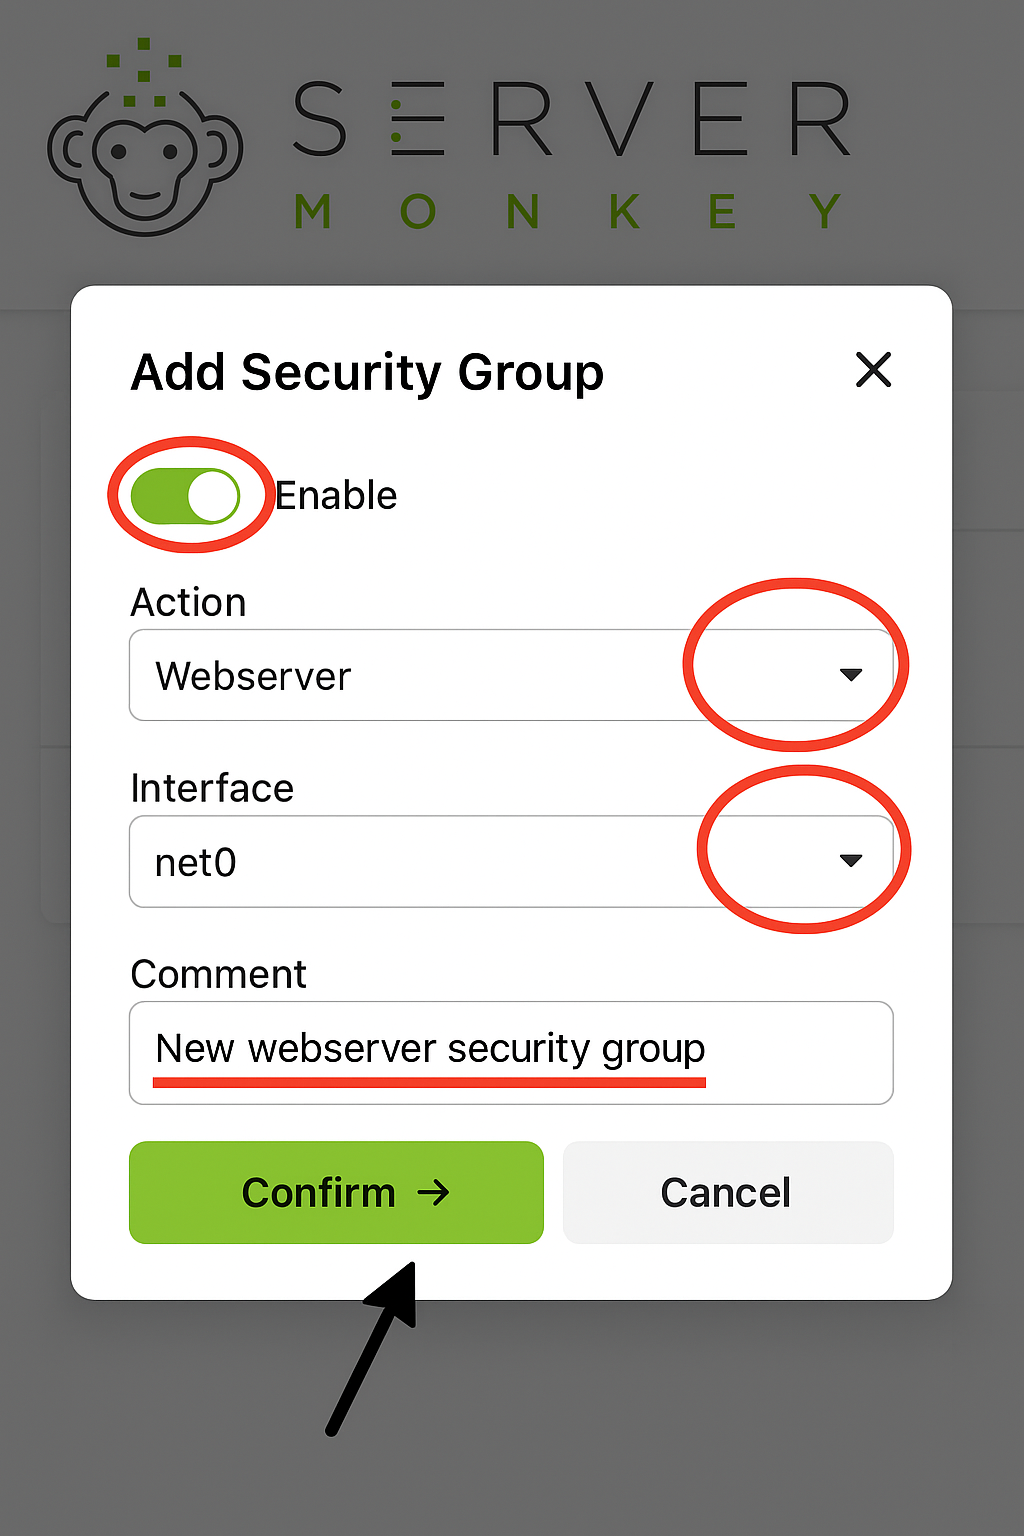
Access "Additional Actions" menu and select "Add Security Group" for grouped rule management. Choose action type (like "Webserver") and interface, then add descriptive comments for organization.
Step 5: Configure Firewall Options
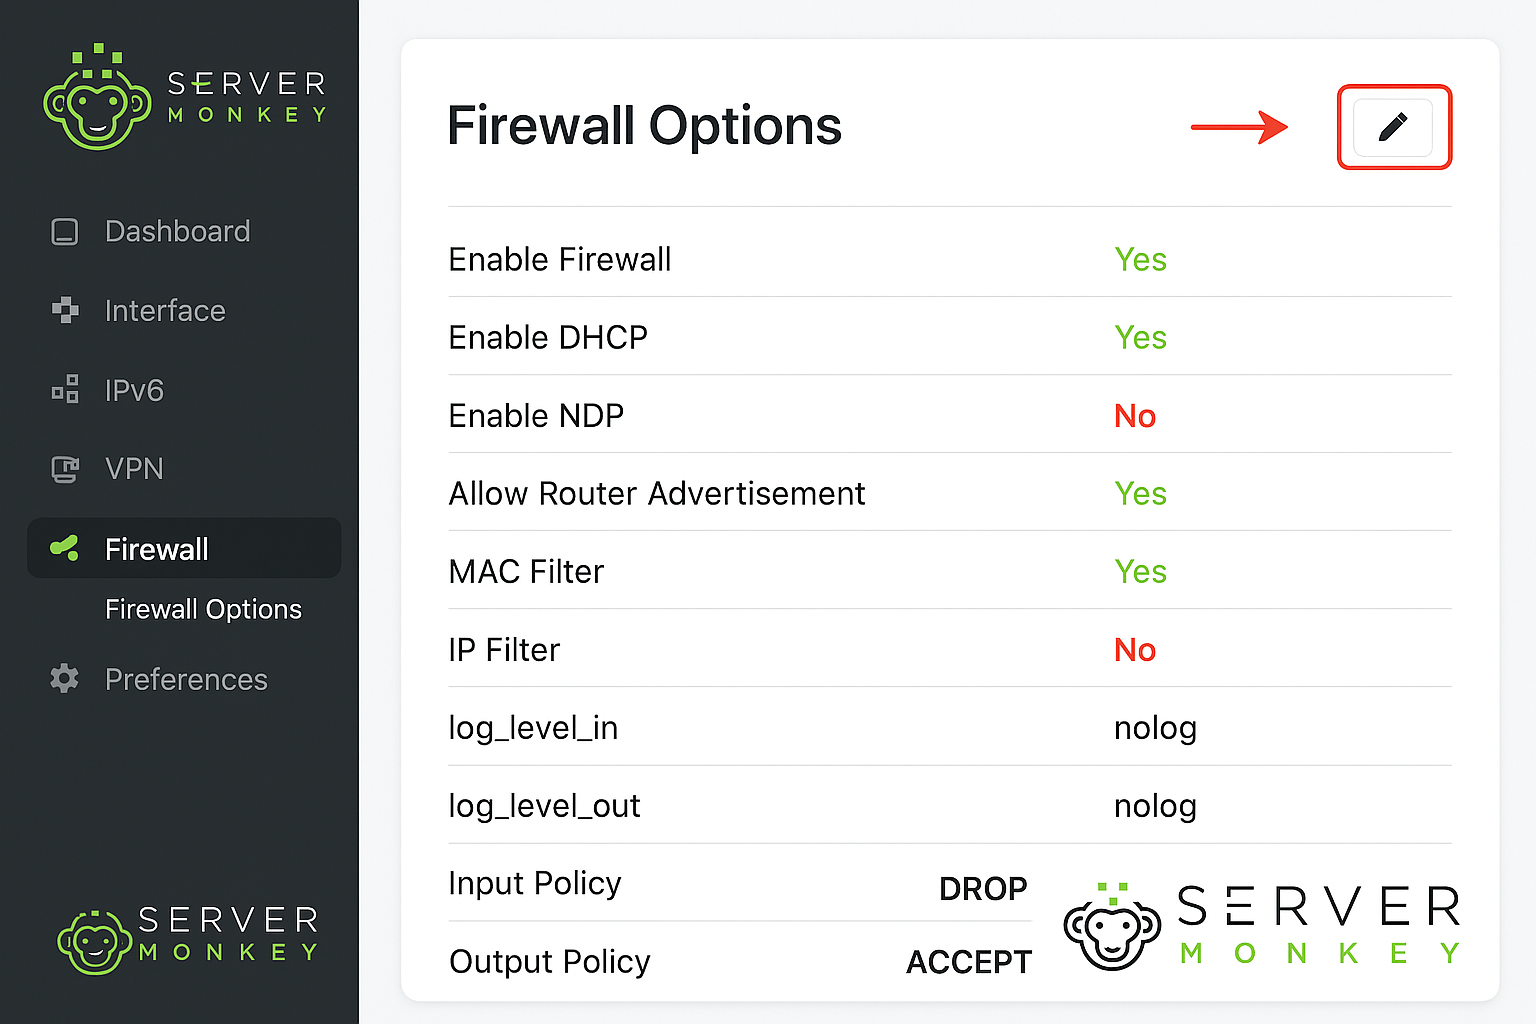
Navigate to "Firewall Options" in the sidebar to access global firewall settings. Click the edit button to modify core firewall behavior and protocol settings.
Step 6: Edit Firewall Settings
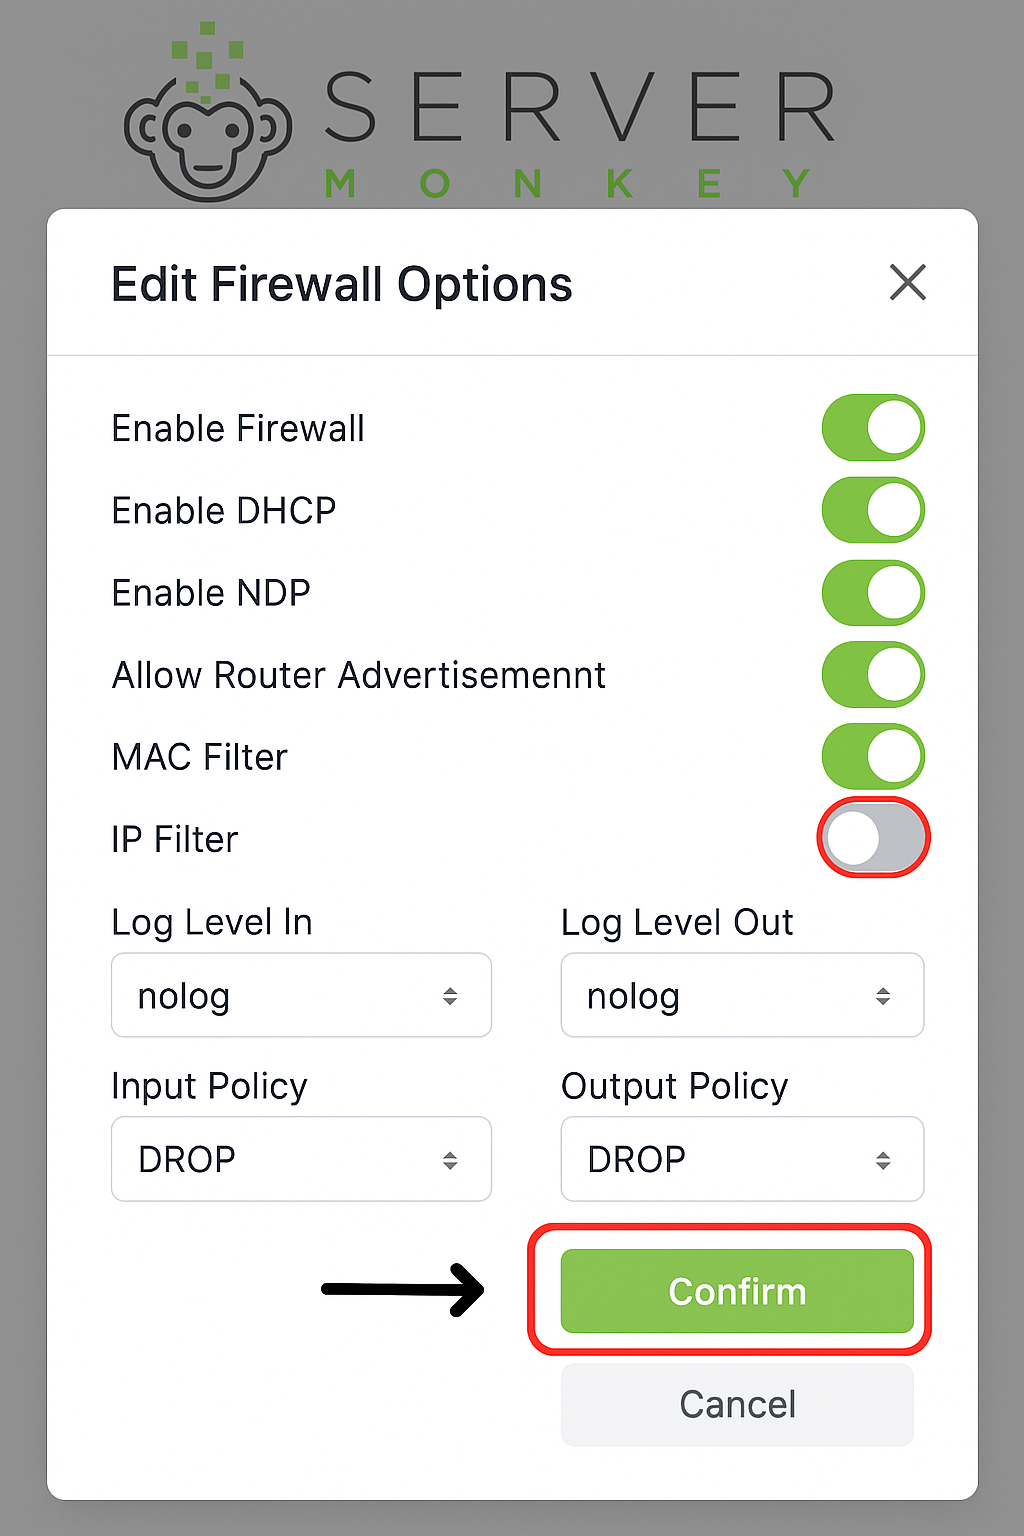
Toggle enable/disable for: Firewall, DHCP, NDP, Router Advertisement, MAC Filter, and IP Filter. Configure log levels (in/out) and set input/output policies (DROP/ACCEPT) as needed.
Important Notes:
•Rules are processed by position order (0 = highest priority)
•Always backup firewall rules before making changes
•Test rules carefully before applying to production
Warning: Firewall changes take effect immediately. Incorrect rules may block legitimate traffic.
Support
For additional help with firewall management, contact Server Monkey support